Entry Mode
The primary purpose of the Entry Mode is to quickly input all strand or trench information, including branch structure, that is necessary for network design. While in this mode, all functions must be preceded with a - as indicated on the toolbar.

Columns
Branch
Current branch number.
Node
Current Node, also can be referred to as line or row.
Brand and Node values
Branch and Node columns are the branch and node numbers and are automatically generated on the fly by the Design Assistant.
ftg
The distance, usually between poles or pedestals.
hc
Number of units to feed from that span location.
cab
Cable ID value from the cable spec file.
lv
Tap port level defined in the parameters spec file.
TSG
Tap selection group defined in the tap spec file.
Map
Map number defined in the Global Settings.
Loc
Location ID as defined by the user.
1234
The blank column to the right of Loc is the active/amp column indicator. If an active is on the node line then a triangle ▶ will be indicated.
[Branch1] [Branch2]
Branch 1 (left) & 2 (right) columns, branch number is indicated by the value inside of the bracket. No coupler ID values are visible in this mode.
Amp Name
Amp Name Column displaying the active device name as defined using - . + Name.
Moving Around
The keyboard commands to move around in the Entry mode are the same as in Design and Power Mode.
Keyboard
See more about Using the Keyboard in the getting started section.
← Go into [Branch 1]
→ Go into [Branch 2]
. Move the cursor to the next column
Backspace Remove character or back one column
Remove one character in the current column, if no characters exist then move back one column to the left.
Enter Copy the information from the previous node
The Design Assistant will automatically keep the cable type and map numbers input at previous nodes until it is changed.
Enter into a branch
When using the left or right arrow to go into a branch, if only one branch column has a value than either arrow will enter the branch. When two branches reside on a single node you must use the proper left or right arrow to enter the correct branch.
Entry Commands
-0 Fwd/Rev Forward/Reverse
Toggles the entry mode between the default forward direction in which the cursor is advanced one node forward after each entry and the reverse direction where the cursor remains in place and all entered data are moved down. Selecting reverse entry automatically turns on insert. When on, this function will be highlighted in reverse on the top of the screen.
The reverse entry mode can be useful if the designer wishes to begin at the end of a strand/trench route and then work back upstream toward where the optical receiver will be placed.
-1 Jump Jump
Though not shown in the menu, this function allows you to quickly "jump" to virtually any place in the network.
More on Jump
See the Jump section at the beginning of this chapter for more information.
2 Ins/Ex Insert/Exchange
Switch between insert and exchange modes. The default mode is exchange where all data, if entered on a line with an existing node, replaces the data already on the node. In insert mode, data entered at an existing node will be inserted at the cursor position, moving any nodes on or after the cursor down one. Thus, in insert, a footage entered at node 1.8 will create a new node 1.8 with that footage, and the previous 1.8 will be moved to 1.9.
-3 Return Return
This command moves the cursor to the end of the branch feeding the current branch. This is helpful if you wish to enter sub-branches as you get to them and then continue entering the main branch. This command will have no effect if invoked from branch 1.
-4 NetInit Network Initialization
Displays the network initialization window. This is useful if your network was originally created using the wrong signal levels. Please seeChapter 5: Utilities,sectionNetwork Initialization Windowfor more information.
-.4 Label Label
This function allows you to give your branches a name up to 14 characters. Once a branch is named, the name will display, in brackets “[ ]” directly to the right of the branch information. For example, if you named branch 3 (of 7) “Broadway”, then the top of the screen would show “Branch 3 of 7 [Broadway] Starting 1.4. Any branches fed from “Broadway” and not specifically given a name of their own will display the name “Broadway” in parenthesis “( )”.
-5 ChBrSt Change Branch Start
Allows you to move the starting point of the branch currently displayed to a different node. Branches may not be moved so that they form a loop or so that more than two branches begin at a single node. If loop creation is attempted, a warning message will be displayed and the branch start will not be moved. This command is very useful when a node with a branch start point has accidentally been deleted. In this case, you would get an error message that said “Branch x does not begin anywhere”. If you need the information that is on branch x, jump into that branch and change the branch start point to the correct node.
-6 ChAfTh Create Branch After This Branch
Creates a new branch immediately after the branch currently displayed on the screen, increasing the branch number of all subsequent branches by one. For example, if you were creating a branch from branch 3 in a network consisting of 5 branches, the branch this would create would be branch 4. The old branch 4 will automatically be renamed to branch 5, branch 5 will be renamed to branch 6, and so on.
-.6 New Network Create a New Network
Create a new network. Notice that the button to create a new network is greyed out in this mode.
-7 ChAfLst Create Branch After Last Branch
Creates a new branch after the last branch in the network. Branch numbers of all existing branches in the network are unchanged. This is the recommended method of branch creation for new users.
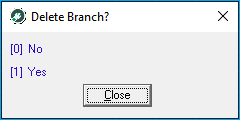
-8 DelBr Delete Branch
Deletes the branch currently displayed. When invoked, you will be asked to confirm the deletion of that branch (yes or no). Selecting “Yes” will delete the current branch and all downstream branches.
-9 SetMDU Set MDU
Designate the house count of a node as being an MDU house count or edit the MDU information regarding a node already designated as having an MDU house count.
-.9 DpMDU Duplicate MDU
Automatically copies the MDU information that was input at the previous MDU location.
More about MDUs
Ins Insert
Insert a node with zero footage and house count and the same cable type as the node above at the cursor position without changing insert/exchange mode status.
Del Delete
Deletes the node under the cursor. Note that if a branch begins at the deleted node, the branch itself is not deleted only the starting point of that branch is deleted.
- . + Name Name
Opens Amplifier Definition Window. Within this function you may set the amp identifier for the amplifier at the cursor location and assign the feeder legs that begin from that amp (if any) as well as move to, create, rename, or delete these feeder legs.
More about MDUs
- . . + Notes Notes
The “Sticky Note” function allows entry of a text note at any node in the network. This note may be used to enter any information desired.