Creating a daily database backup
- Requirements
- An file archive program (7-zip, WinZip, WinRAR) with a CLI capabilities.
- Lode Database Utilities version 11.1
- Procedure
- Setup file archive program
- Create a PowerShell script for database backup
- Optional Alternative to create
BATscript for database backup - Create a daily Scheduled Task
Requirements
Install a file archive program such as 7-zip, WinZip, or WinRAR. The program you select should have a command line interface. In this documentation we use the 7-zip program as an example.
Install The Lode Database Utilities program (version 11.10). This program will create an Oracle Database Dump File (DMP).
Procedure
- Create a directory to save the archives
- Create a file list for your archive program
- Create a PowerShell or BAT file
- Optional command to move archives to a network share or another drive
- Create a daily task to create the backup archive
Create backup directory
First you need to create a directory to save the daily backup to. In this example we will work out of the C:\DMP directory on the Oracle Database server.
Open a CMD prompt or Powershell
Create a directory on the C drive named DMP
CD C:\
mkdir C:\DMP
Create file list
We will be working with 7-zip to archive our files and specify the files we want to include in our archive using a file list.
Navigate to the directory where you installed 7-zip. The default install directory on Windows is located at C:\Program Files\7-zip.
Create a new text file named lode_backup_files.txt.
C:\Program Files\7-zip\lode_backup_files.txt
In the text file, list the files you want to include in the archive.
Example:
C:\DMP\*.dmp
C:\DMP\export.log
In the example we are telling 7-zip to archive any file with the DMP file extension and our export.log
This can also be done from PowerShell.
# Define the file path
$filePath = "C:\Program Files\7-zip\lode_backup_files.txt"

# Define the content to be written to the file
$content = @"
C:\DMP\*.dmp
C:\DMP\export.log
"@

# Create a new text file and write the content into it
New-Item -Path $filePath -ItemType File -Force | Out-Null
Set-Content -Path $filePath -Value $content
Create a PowerShell script
You can use PowerShell to complete this task. Save the code example below as C:\DMP\LodeBackup.ps1.
PowerShell
# Start FiberExport.exe
# -ArgumentList {database name}, {SYS password}, {System password}, {Schema}, {output dir}, {database name}
Start-Process -FilePath "C:\Program Files\Lode Data Corporation\Database Utilities 11.1\FiberExport.exe" -ArgumentList "lode", "lode", "lode", "data", "C:\DMP", "lode_$((Get-Date).ToString('yyyy_MM_dd')).dmp" -Wait

# Change directory to 7-Zip
Set-Location "C:\Program Files\7-Zip"

# Create 7z archive
& .\7z.exe a -t7z "C:\DMP\LODE_$((Get-Date).ToString('yyyy_MM_dd')).7z" "@lode_backup_files.txt"

# Change directory back to C:\DMP
Set-Location "C:\DMP"

# Delete .dmp and .log files
Remove-Item "*.dmp"
Remove-Item "*.log"
Tip
Keep in mind that if you have a large database or your database is on a Virtual Machine, your C: drive may get full quickly. You can add a line to your script to move your archives to another drive or to a network share.
If you want to move the 7zip archive files to a different location, add this to the end of the script.
PowerShell
# Define the source file path
$sourceDirectory = "C:\DMP"

# Define file extension to move
$fileExtension = "*.7z"

# Get all files with the specified extension in the source directory
$filesToMove = Get-ChildItem -Path $sourceDirectory -Filter $fileExtension

# Define the destination network share path
$destinationFolderPath = "\\server\share\folder"  # Or use "E:\backups" to move the files to another drive

# Move each file to the network share
foreach ($file in $filesToMove) {
    Move-Item -Path $file.FullName -Destination $destinationFolderPath
}
Create BAT file (Alternative to PowerShell)
As an alternative to creating a PowerShell script you can create a BAT file instead.
Open Notepad or your favorite text editor
In the file place the following lines:
-
START /d "C:\Program Files\Lode Data Corporation\Database Utilities 11.1" /B /wait FiberExport.exe lode lode lode data C:\DMP lode_%date:~-4,4%_%date:~-10,2%_%date:~-7,2%.dmpTip
The { } are placeholder for arguments we are passing to the FiberExport.exe program. Replace the { } with your arguments and remove the { }. FiberExport.exe {database name} {SYS password} {System password} {Schema} {output directory} {database name}_current date.dmp
This will start the Lode Database Utilities program and create a DMP file in the
C:\DMPdirectory with the current date in the name. -
cd C:\Program Files\7-ZipChanged to the 7-zip program directory
-
7z a -t7z C:\DMP\\{database name}\_%date:~-4,4%_%date:~-10,2%_%date:~-7,2%.7z @lode_backup_files.txtCreates a 7z archive in the C:\DMP directory with your database name and the current date using the lode_backup_file.txt list
-
cd C:\DMPChanged to the C:\DMP directory
-
del *.dmpDeletes any DMP files that exist in the current working directory
-
del *.logDeletes any log files that exist in the current working directory
Example:
This uses a database named lode with all user passwords = lode and a schema = data following the FiberExport.exe command.
START /d "C:\Program Files\Lode Data Corporation\Database Utilities 11.1" /B /wait FiberExport.exe lode lode lode data C:\DMP lode_%date:~-4,4%_%date:~-10,2%_%date:~-7,2%.dmp
cd C:\Program Files\7-Zip
7z a -t7z C:\DMP\LODE_%date:~-4,4%_%date:~-10,2%_%date:~-7,2%.7z @lode_backup_files.txt
cd C:\DMP
del *.dmp
del *.log
If you want to move the 7zip archive files to a different location, add this to the end of the BAT file.
BAT file
move /-y "C:\DMP\*.7z" "E:\Backups"
Tip
If it is still unclear about the arguments that are passed on line number 1, it may be useful to open a run the FiberExport.exe program. You'll then see the prompts for the arguments we are passing.
Save the file as a BAT file such as LodeBackup.BAT in the C:\DMP directory
C:\DMP\LodeBackup.BAT
Schedule a Windows Task
Schedule a Windows Task to be ran daily at your preferred time using the Powershell file you created. The process is similar for a BAT file.
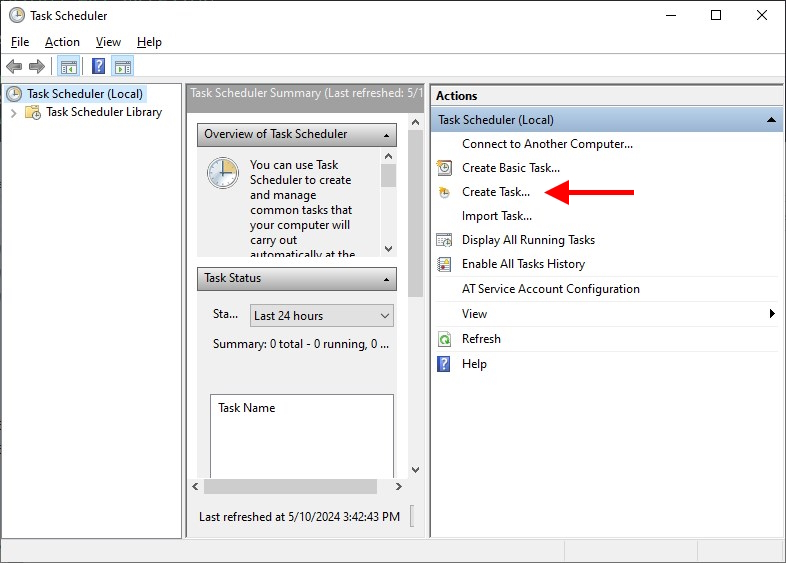
Open TaskScheduler
Open the Windows TaskScheduler and select Create Task from the Actions section
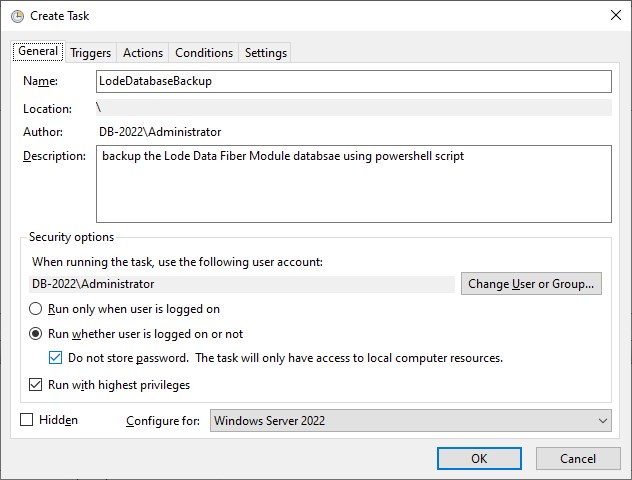
Create Task - General
- Name: Provide a name for the task
- Description: Provide a task description
- Security Options: Provide the desired security options
- Click on the Triggers tab when completed
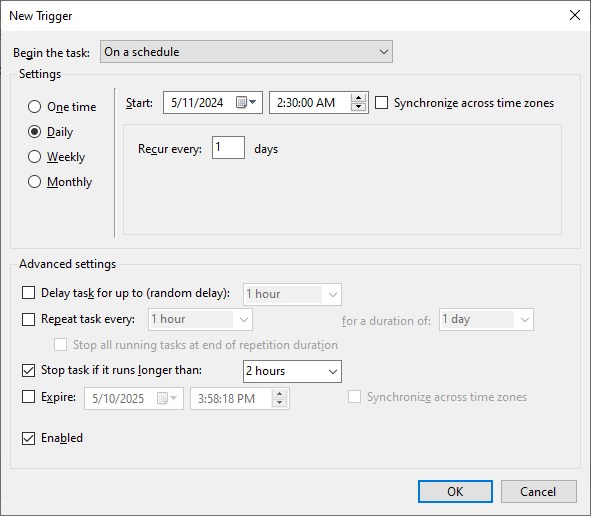
Create Task - Triggers
- Select the New... button to create a new trigger
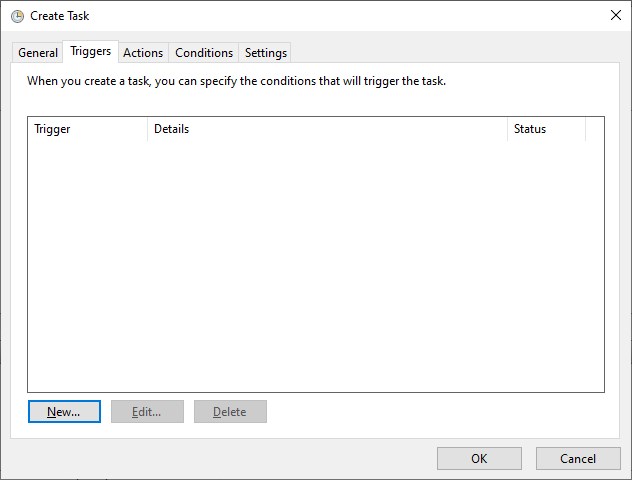
- Select desired settings
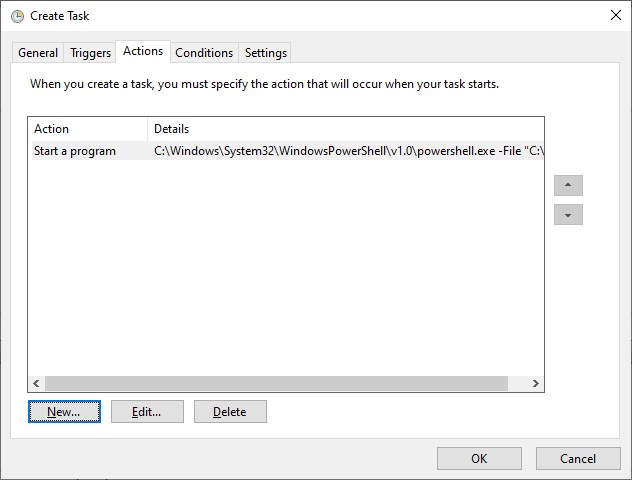
Create Task - Actions
- Select the New... button to create a new action

- Action:
Start a program - Settings:
C:\Windows\System32\WindowsPowerShell\v1.0\powershell.exe - Add Arguments:
-File "C:\DMP\LodeBackup.ps1" - Click OK
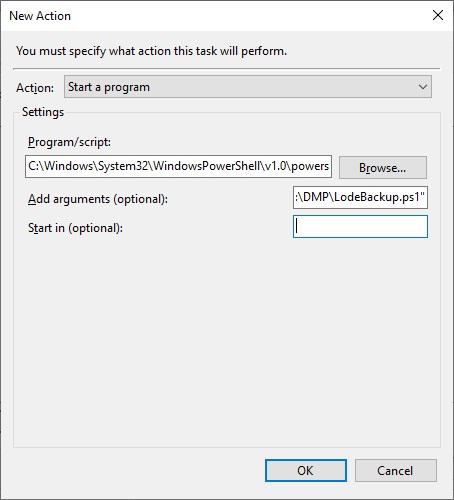
Your new action has been created, click on the Conditions tab.
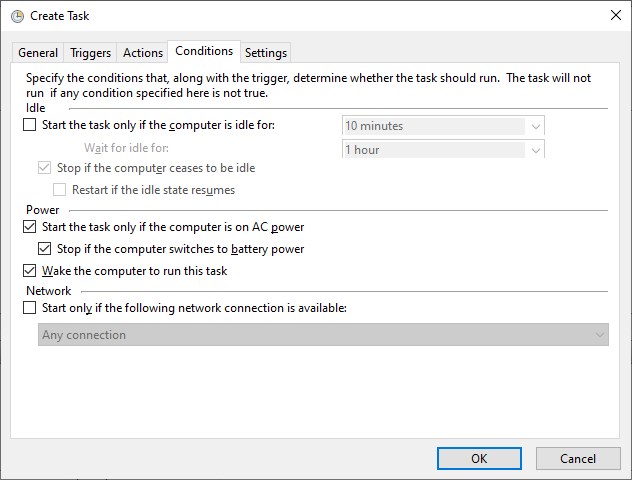
Create Task - Conditions
- Create your desired conditions, recommended defaults are shown.
- Click
Settingstab
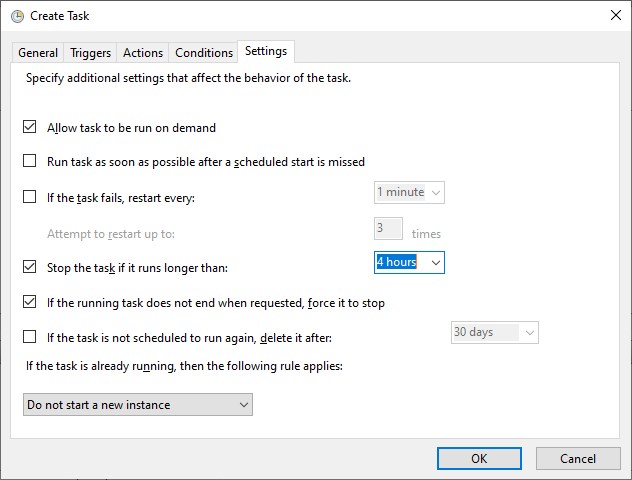
Create Task - Settings
- Create your desired settings, recommended defaults are shown
- Click OK to complete setup
You will now have a daily task that will create a DMP file using the Lode Data Utilities program. Once the DMP file is created the script will archive and compress the file using 7-zip. After the files are archived the script will clean up the left over DMP file, log files, and move the archive to another location (if configured).