Macros
Macros are a useful set of tools in the Design Assistant. Macros record a series of key strokes and mouse clicks within the Design Assistant that can be executed with a single shortcut key. They are useful when presented with repeatable tasks in your workflow.
In this lesson we will create 3 different macros to accomplish the list below. The final example in the list will run a batch macro to create a single network bill of materials for a given group of networks.
Macro Examples:
What is a Macro?
For more information see Chapter 11: Macros of The Design Assistant Manual.
Node Setup
It's likely that when you first setup a fiber optic node the process and configuration is the same each time.
For example, the amplifier code (61) will always have 4 ports which use the 200 coupler code. We also want to be sure that these 4 ports have a branch number of 1, 2, 3, and 4. That way we know that branches 1-4 are ports directly off of the node. In order to accomplish this we should setup and create the node and branch when we first create network. This is a repeatable task which is perfect for a macro!

Setup a Macro
Follow the steps to create a macro that will setup a node with 4 ports.
Move Cursor to Home Base
Before creating a macro it's best to move your cursor to the "Home Base".
The home base is the FTG | HC | CAB | LV | column.
Since a macro is a recording of key strokes, if you try to run a macro with your cursor in a different column than when it was created your macro will not work. By always placing your cursor in the home base you will always know where your cursor was when you created the macro.
Open the Macro Manager
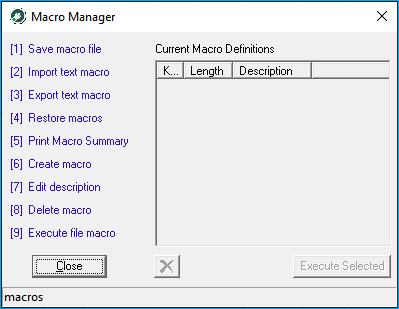
Type * * or select Tools → Macro Options... from the pull down menus.
Create Macro
Select 6 to create a macro.
Assign shortcut key

The ? press key to assign to macro dialog is shown in the upper left corner of the design mode.
Select the n key to assign the macro shortcut.
Key Assignment
Select a key to assign the macro shortcut to. In this example we'll use the n key for "Node Setup".
The shortcut key is case sensitive so N and n can be assigned different macros.
Macro Description
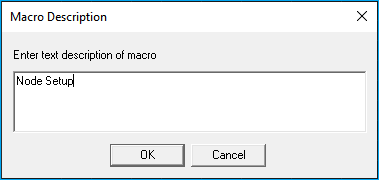
Provide a macro description such as "Node Setup" and then select OK.
Macro record on
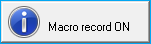
Macro record is now on as indicated in the lower right of the Design screen.
Record is on!
Every key stroke and mouse click is now being recorded! Make sure to limit your mistakes 😉.
Record Key Strokes
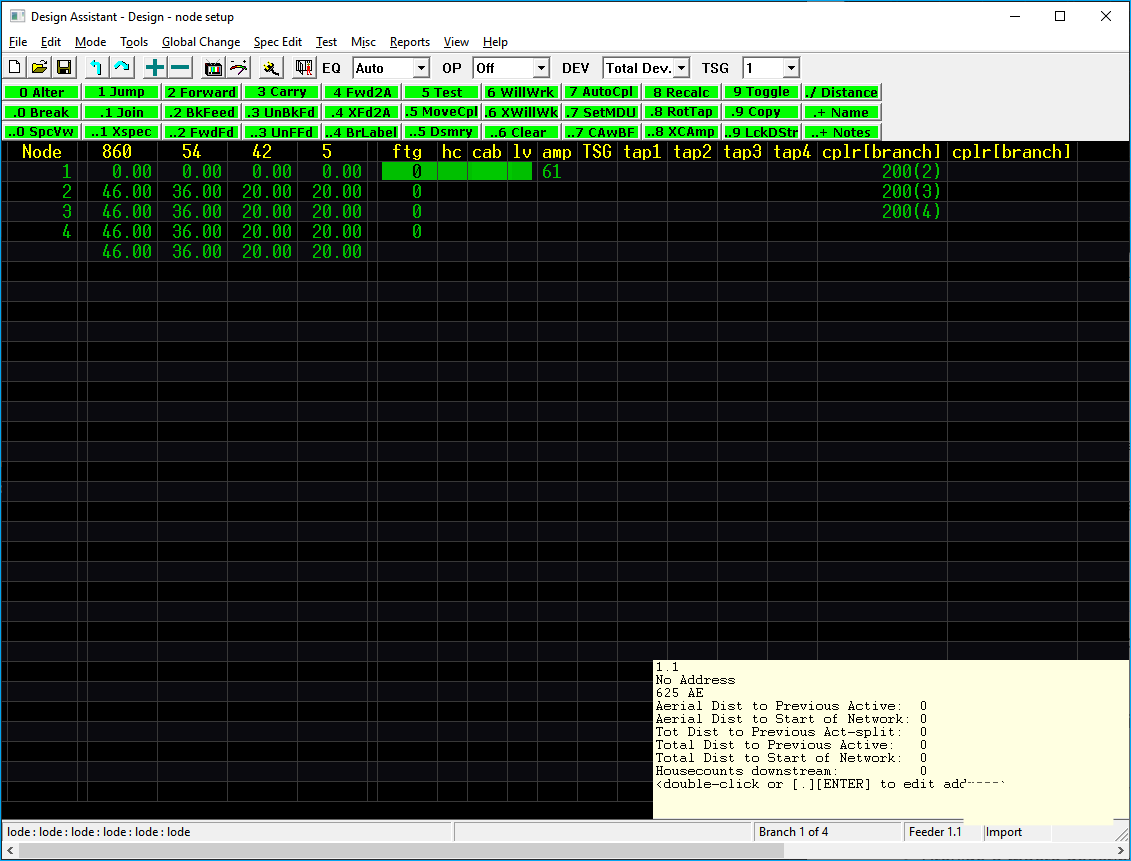
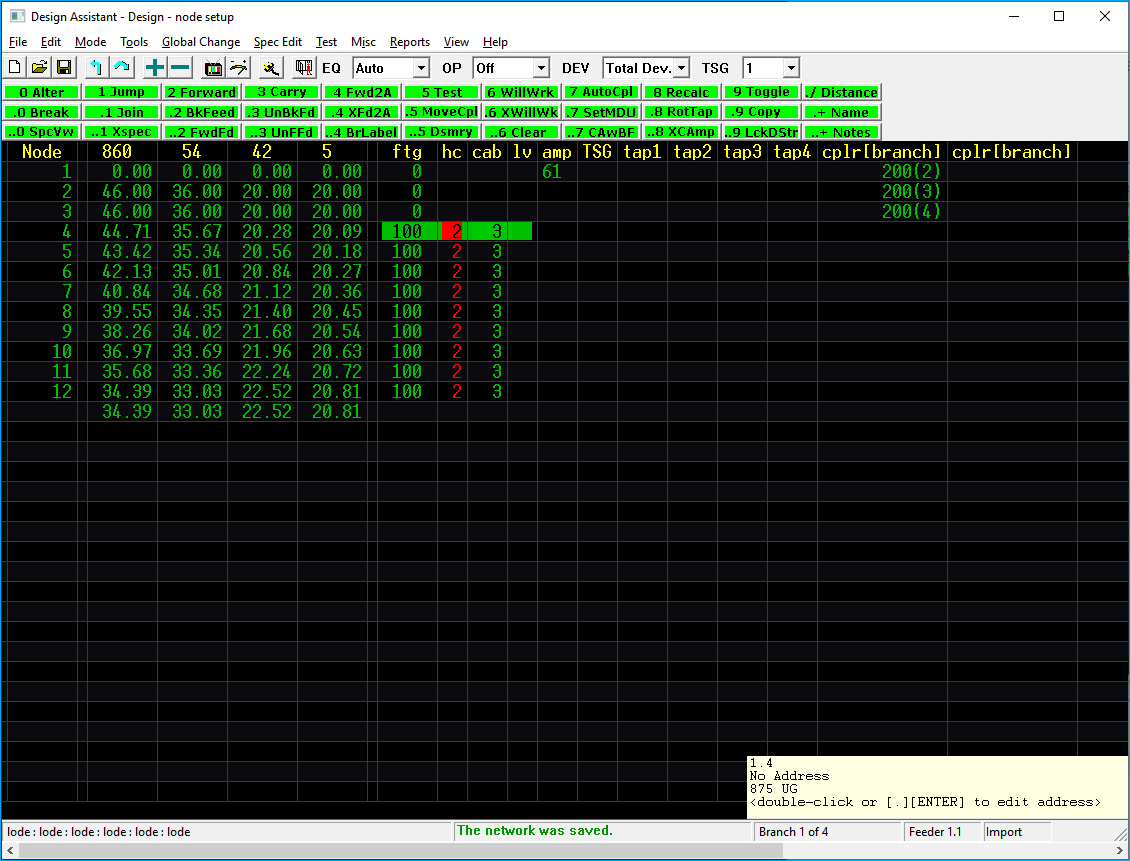
To create a node setup select the following key strokes:
Create blank lines
- INSERT 5 times
- This will create 5 blank lines below our cursor
Create Node
- ➡ right arrow to the
Ampcolumn - 0 Alter
- 6 1 for the fiber optic node
- Enter to terminate the alter command
Create Auxiliary Port
- ➡ right arrow 6 times to the
Cplrcolumn - 0 Alter
- 200 code for an auxiliary port
- Enter
- ⬇ down arrow to the next line
Repeat Create Auxiliary Port
- 0 Alter
- 200 code for an auxiliary port
- Enter
- ⬇ down arrow to the next line
Repeat until you have a coupler code of 200 on 3 consecutive lines.
Finish
You should have a node with 3 coupler codes of 200 and 1 blank line as shown.
Complete Macro
After recording all the key strokes to create a new node terminate the command by selecting *.
Macro complete
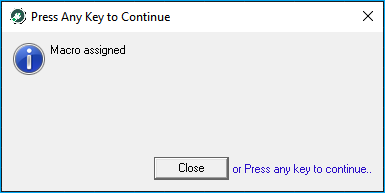
The macro is now complete. Press any key ot continue...
Save Macro File
Before exiting the program it's important to save the macro you just created.
To save the macro you need to open the macro manager by selecting * * and then option 1 Save macro file.
Execute Macro
To execute the macro select * n or select the it from the macro manager and click execute selected.
Remember your Cursor
Remember the cursor must be in the same location as when you created the macro. Make sure to place the cursor in the "home base" before executing it.
Underground Sweeps
Setting up a macro to create underground sweeps would also be a good use case for macros. Underground sweeps are 5' risers up and down into an underground enclosure. In order to avoid keying in unnecessary sweeps I would wait until I complete my design to put them in. This could slightly change the design but this is something we can resolve easier than deleting a bunch of unnecessary sweeps at the end.
Start by following the steps in Node Setup. The only difference is Steps 5 - 7 where we will assign a different shortcut key, description, and key strokes.
- Setup Macro
- Move Cursor
- Open Macro Manager
- Create Macro
- Shortcut Key
- Description
- Key Strokes
- Complete Macro
- Save Macro
Cursor Starting Location
Make sure your cursor is in the home base column. It's best to have some information in the network. All you need is a couple of strand footages.
Also make sure your cursor is at the start of the first strand footage.
Shortcut Key
Assign s as the shortcut key for underground sweeps.
Description
Type Underground Sweeps in the description dialog box.
Key Strokes
- Select . 0
Break - ⬇ down arrow to next line
- . INSERT to insert a 0 line
- 0
Alter - 5 for the sweep footage
- ENTER terminate the
Altercommand - ⬇ down arrow to next line
- 0
Alter - 5 for the sweep footage
- ENTER terminate the
Altercommand - ⬇ down arrow to next line
- * to terminate the macro recording
Finish steps 8 and 9.
You now have a macro that will automatically create two 5 foot underground sweeps.
Single Network BOM
Running a single network bill of materials (BOM) is simple enough that one wouldn't think to create a macro for it. However, many of our customers need to create a single network BOM for all the nodes in a given hub. Opening each network to do this is very time consuming. Creating a single network BOM macro will help reduce the time needed for such a job, but the savings in combination with a batch macro is significant.
BOM
For more information on the BOM read Chapter 8: Reports in the Design Assistant Manual.
We'll create a single network BOM so that we can then run a batch macro in the next tutorial. Open a complete network to generate a BOM from.
Again the steps are the same except for steps 5 - 7.
- Setup Macro
- Move Cursor
- Open Macro Manager
- Create Macro
- Shortcut Key
- Description
- Key Strokes
- Complete Macro
- Save Macro
BOM Shortcut Key
After completing steps 1 - 4 assign the macro shortcut to b.
BOM Description
Type Single Network BOM in the description dialog box.
BOM Key Strokes
- Select F9 for the Generate BOM menu
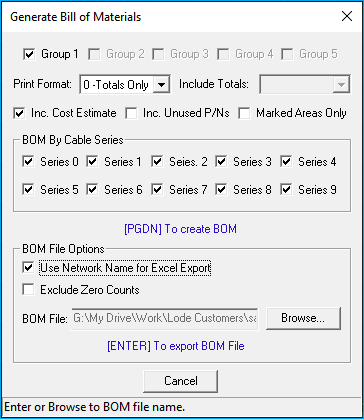
- Select desired options
- Select
Use Network Name for Excel Exportunder BOM File Options
BOM File
This will automatically fill the BOM File: box with the file path to save the Excel report. It uses the path assigned in the design assistant project settings.
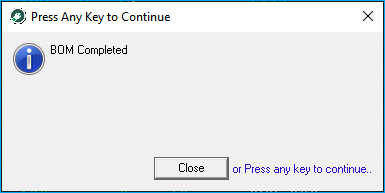
- ENTER to export BOM File
CloseBOM Complete window
Finish steps 8 and 9 to complete the macro.
Run a batch macro
Now that we have a macro to generate a single network BOM we can use this macro on a batch set of network files. The program will open each network we select and run the macro.
Network Specs
When running a batch macro all networks should be using the same specs that are loaded in the design assistant project settings.
It's also a good idea to create a control file and update all the networks before running the batch macro command.
Read more...
- Select
Tools➡Run Batch Macro... -
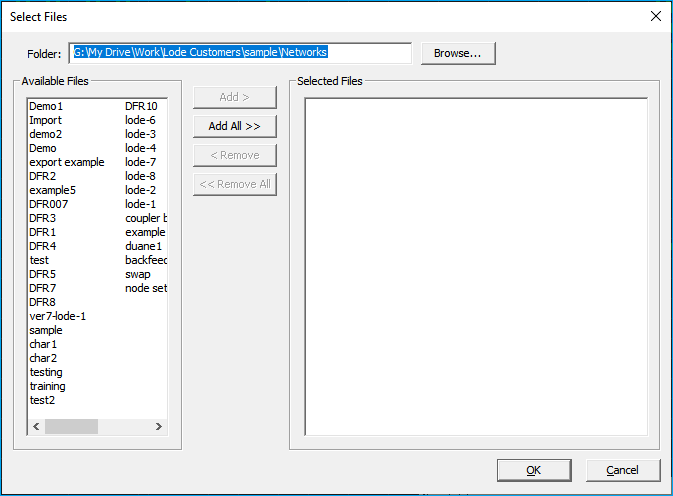
Select Files
Browse to the folder that contains all your network files that you want to run the report on.
-
Select the files under the
Available Filesbox -
Add options
- Add
- Add All
- Remove
- Remove All
-
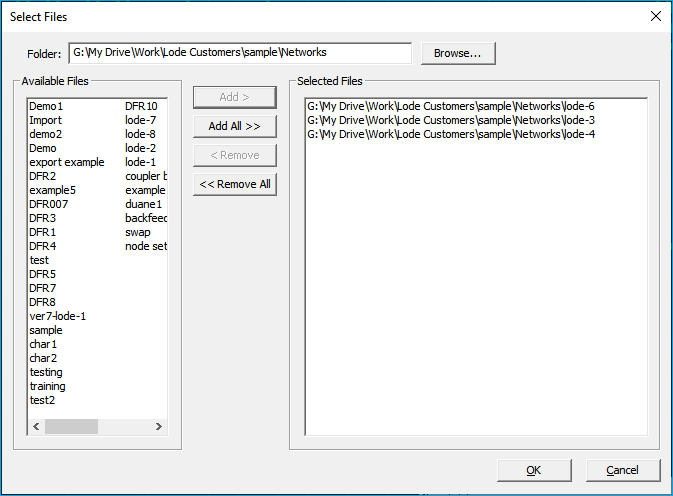
Verify Selected Files box contains network files to run report
OK
- Select Single Network BOM macro
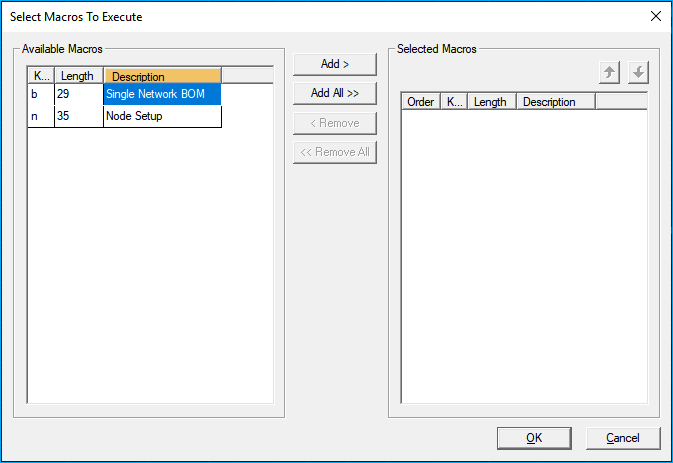
Add >macro toSelected Macros
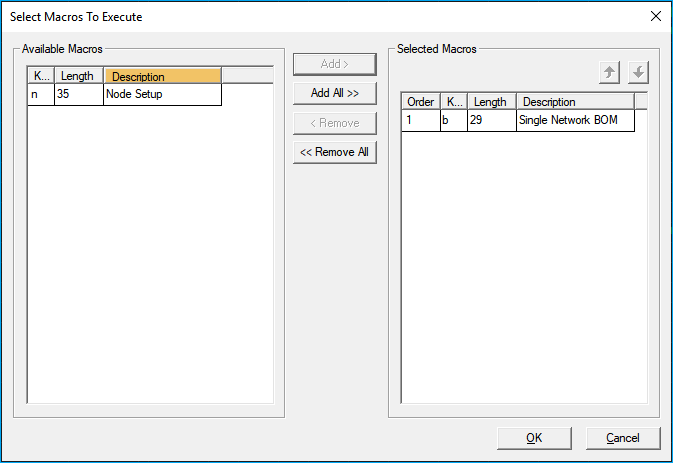
- Select
OK
The macro will now run on all the network files you selected. While the process is not completely automatic, it will save a significant amount of time.
Attention
Your attention may be required should an error occur. While it's ok to grab a cup of coffee, check back to ensure that the macro didn't run into an error and is waiting for you to click OK to proceed.