How to Install The Drafting Assistant
This is the guide on how to install The Lode Data Drafting Assistant.
This document was written to guide the user through the installation of version 10.40+ of The Drafting Assistant. The guide can be used to install most of our previous versions as well as future versions.
This guide will be updated to reflect only significant changes in future releases of the program.
Requirements
The Drafting Assistant is a program build on top of AutoCAD, thus your system should meet the minimum requirements specified by your version of AutoCAD.
As of this writing version 2023 is the current minimum specs your system should meet.
Other Requirements:
- Windows 10 (64bit)
- USB Hardware Lock/Key
- AutoCAD installed
AutoCAD Secondary Installer
AutoCAD must be installed before trying to install The Drafting Assistant. You also need to start/launch AutoCAD to ensure that it has completely gone through the setup process. This is especially important if you install AutoCAD as another user and then switch profiles. AutoCAD will not be recognized as installed unless you've ran the secondary installer for that user profile.
Step 1 - Download Files
Download the program installation files.
When you purchase or upgrade your Drafting Assistant program Lode Data will provide you with a download link.
Save the ZIP file to a folder on your desktop.
Version
The Drafting Assistant has multiple installation files that depend on what version of AutoCAD you use. You'll need to verify that you download the correct files for your version of AutoCAD.
Step 2 - Unzip Files
Unzip the installation files to a folder on your desktop.
In our examples we'll be installing Drafting Assistant 10.40 for AutoCAD 2020. So our install folder is at desktop\10_40\2020. There should be ~ 5 files in the folder related to the install.
Step 3 - Select Setup
Having Admin privileges may be required to install the program. Please consult your IT department for assistance.
Left Clickonsetup.exeto select itRight Clickand selectRun as administrator
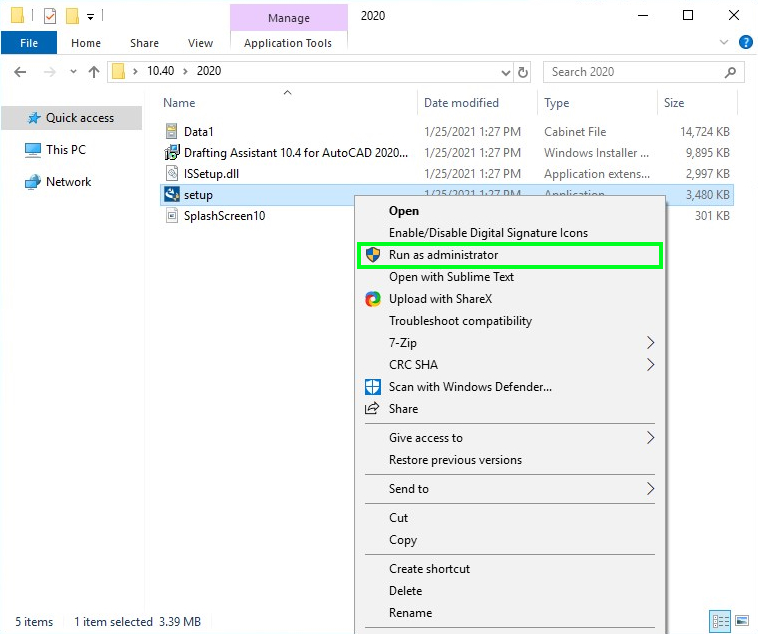
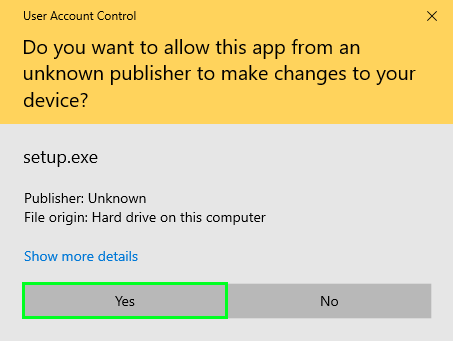
- Select
YESto allow the program to run with admin privileges
1 | |
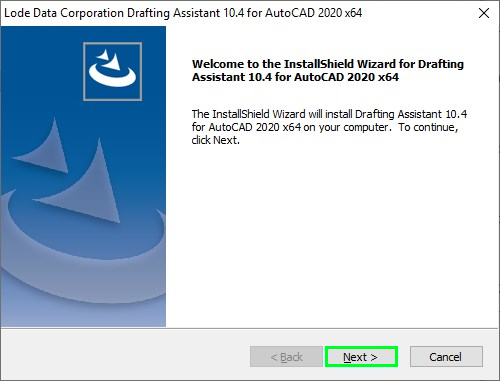
Step 4 - Start Install
The installation wizard will open to begin the installation select Next.
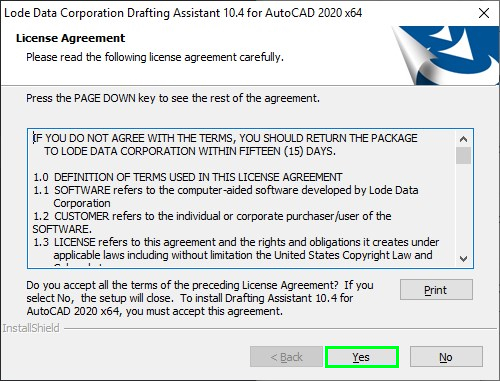
Step 5 - Lode Data License Agreement
Read the Lode Data License Agreement and select Yes to agree to the terms of use.
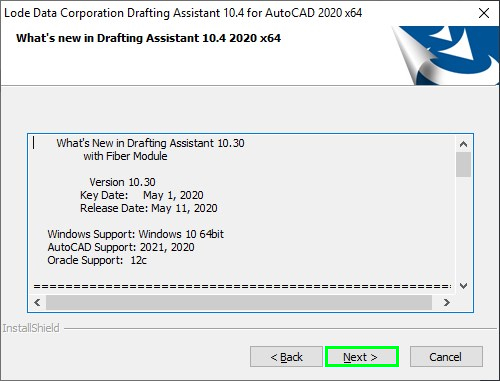
Step 6 - What's New
Read what's new in the program. This list highlights bug fixes and new features that have been added for your specific version.
Select Next.
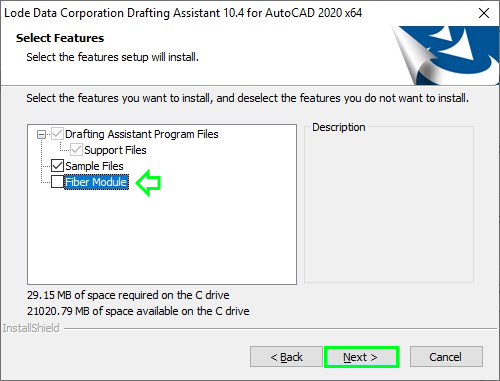
Step 7 - Select Features
Select the features you'd like to install with the program.
Options:
 Sample Files
Fiber Module
Sample Files
Selected by default
This option will install our sample files. Consider installing these if you are new to the program and plan to go through the manual or training.
Change Default
The default location of the sample files is in the user's documents directory. You may want to change the directory. The files should be installed in a directory where the user has proper read/write permissions.
Fiber Module
Selected by default
This option will install our Fiber Module. If you only purchased the Drafting Assistant you will want to un-check this option.
Fiber Module Error
If you do not un-check this option and your USB key does not have a Fiber Module serial number your user will get an error when they start the program.
To resolve the "Security Device is not mastered for this product" error you'll need to uninstall the Drafting Assistant and repeat these steps. Making sure to un-check Fiber Module at this step.
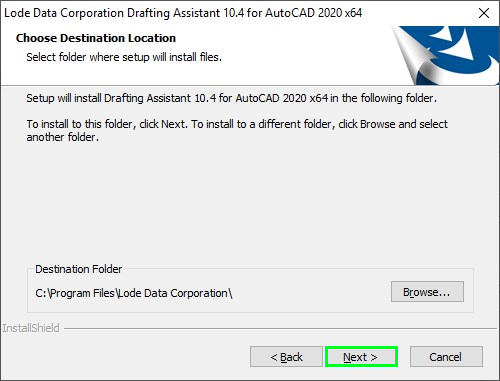
Step 8 - Destination Folder
C:\Program Files\Lode Data Corporation
Default location where the program is installed. You do not need to change this setting 99.9% of cases.
Select Next.
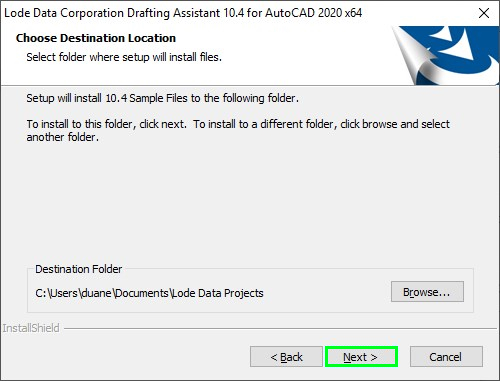
Step 9a - Optional Features
C:\Users\<user-name>\Documents\Lode Data Projects
If you selected to install our sample files from step 7, you'll be prompted to install them to the default location. Otherwise you will not get this window.
Select Next.
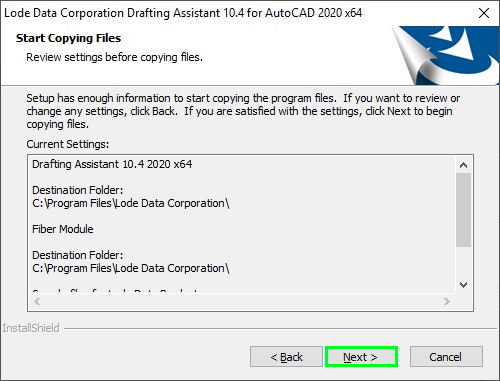
Step 9b - Copy Files
The program confirms that all the file locations you selected in previous steps are listed.
Select Next.
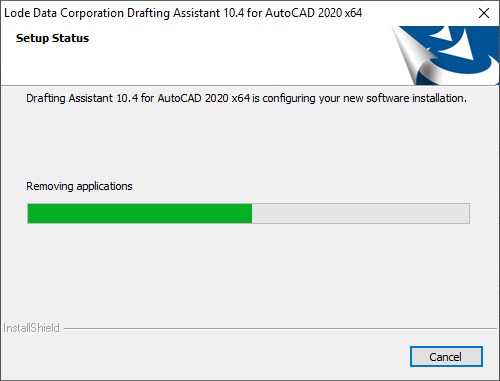
Step 10 - Setup Process
The setup process shows the status of the installation with the progress bar.
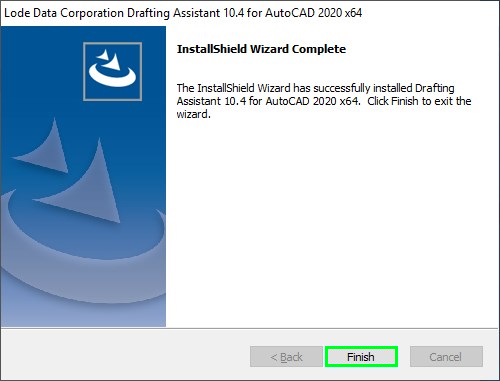
Step 11 - Installation Wizard Complete
Select Finish to complete the installation.
Step 12 - Attach USB Hardware Lock/Key
Attach the USB device that Lode Data Corporation provided you. This is a blue USB device. The device must be attached to a USB port directly on your computer. Using a hub or any other 3rd party device may cause the device to malfunction.
USB FAQ
For more information on your USB Key, please visit our USB Keys FAQ.
Lode Data Corporation also offers a keyless network version. This license is reserved for customers with 20+ licensing.
Step 16 - Launch Program
![]()
You should now have the Drafting Assistant icon on your desktop or start menu. Double click on the program to open and begin working with the program.