How to Install The Design Assistant
This is the guide on how to install The Lode Data Design Assistant.
This document was written to guide the user through the installation of version 10.50 of The Design Assistant. The guide can be used to install most of our previous versions as well as future versions.
This guide will be updated to reflect only significant changes in future releases of the program.
Requirements
The Lode Data Design Assistant does not require a vast amount of computing power. Thus budget or entry level PCs will be able to run the program, however; for the best user experience meet the minimum recommendations below.
 Windows 10 or 11 (64 bit)
4 GB RAM
128 GB SDD drive
Intel i5 CPU or higher
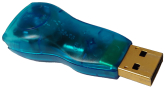
USB Hardware Lock/Key
USB Key / Dongle
Included in your Design Assistant purchase, you should have the following:
USB dongle
Email from Lode Data with the download link
The Design Assistant requires a special kind of hardware "key" (also called a "Dongle") connected to a USB port to operate properly. If the software does not find this key, then it will not function. The key drivers are automatically installed when installing the Design Assistant software. It's recommended to attach your hardware key after installing the program.
Alternative Licensing
We offer a network license which removes the need for the USB Dongle. There are minimum purchase requirements in order to qualify for network licensing.
Contact our sales department for further details.
More Info
More information on our USB keys can be found on our FAQ USB Keys section.
Your key is your license
You hardware key/dongle is your license. Do not lose your key as it is non-refundable, non-replaceable, and non-transferable.
Step 1 - Download Files
Download the program installation files.
Save the ZIP file to a folder on your desktop.
Step 2 - Unzip Files
Unzip the installation files to a folder on your desktop. There should be one file in the zip archive called Design Assistant <version> x64.exe.
Installation Names
There are other versions and installation packages available. The name of the EXE file may vary slightly depending on the version you are installing. The general naming convention is <Product Name> <version> <os architecture>.exe.
Step 3 - Select Setup
Having Admin privileges may be required to install the program. Please consult your IT department for assistance.
Left Clickon theDesign Assistant <version> x64.exefile to select it-
Right Clickand selectRun as administrator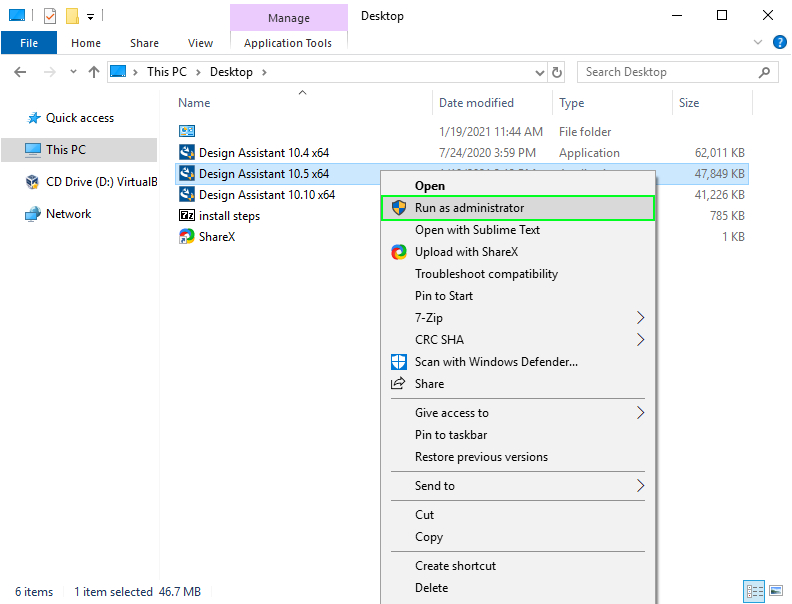
-
Select
YESto allow the program to run with admin privileges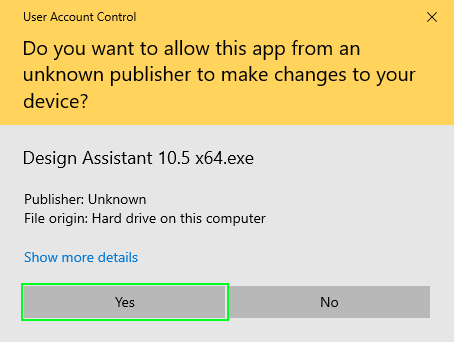
Step 4 - Select Install
Select on Install. This will install the software dependencies listed.
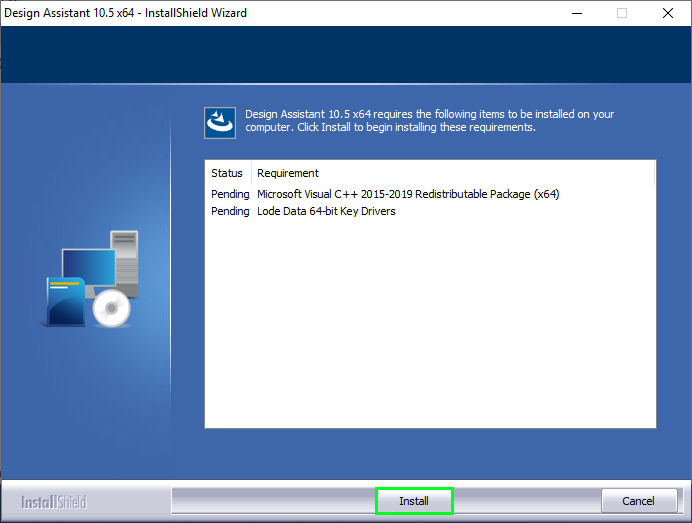
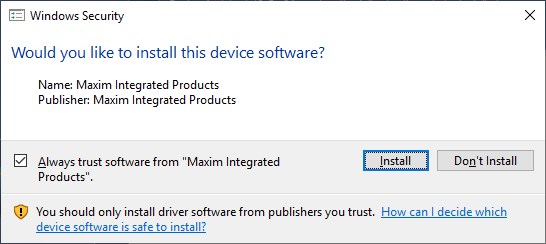
1-wire Key Drivers
During installation you may be prompted to install 1-Wire drivers. If you have older versions or have ever installed these drivers then you may not see the prompt.
These must be installed in order for the USB key to be recognized by your computer.
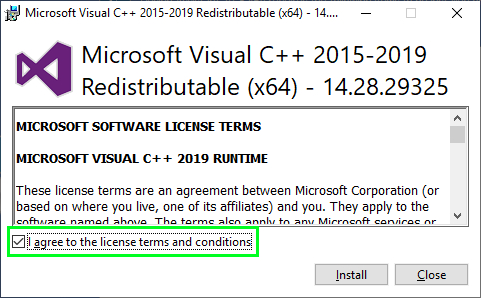
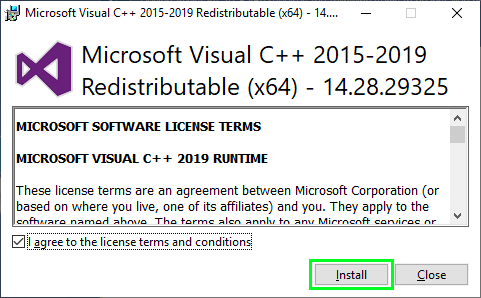
Step 5 - Agree to License Terms
Select to agree to the license terms and conditions. This will install the program dependencies for the Microsoft C++ 2015-2019 redistributables x64.
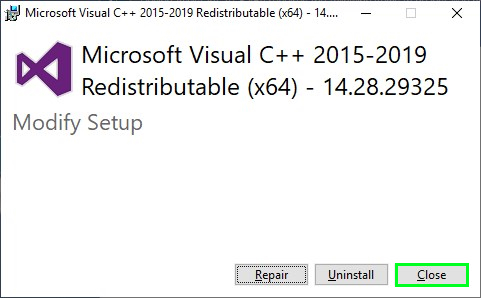
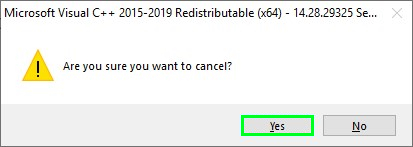
Existing Redistributables
It is possible you already have the Microsoft C++ 2015-2019 redistributables installed. If so you will have a different prompt and can select Close and then Yes to cancel and continue with the installation.
Step 6 - Select Install
Select on the install button.
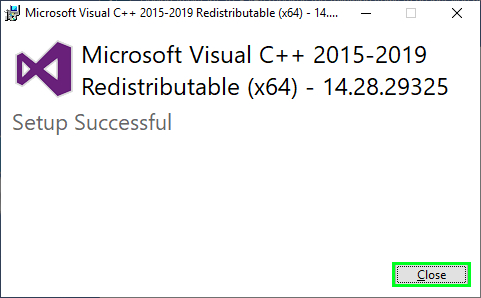
Step 7 - Close Install
Select on the close button. This will complete the installation of the Microsoft C++ 2015-2019 redistributables x64.
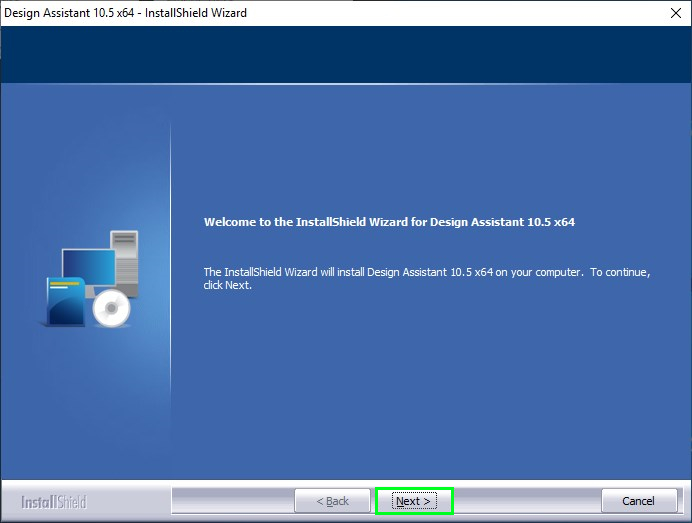
Step 8 - Design Assistant Installation Wizard
Select Next to continue with the Design Assistant Installation Wizard.
Select Defaults
From here forward you can select the default options by selecting Next.
Unless you want to change the location of the program installation or the default location of files.
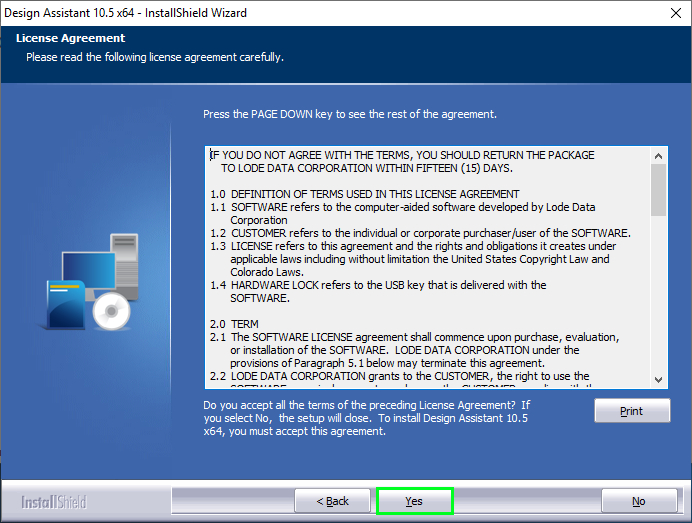
Step 9 - Lode Data License Agreement
Read the Lode Data License Agreement and select Yes to agree to the terms of use.
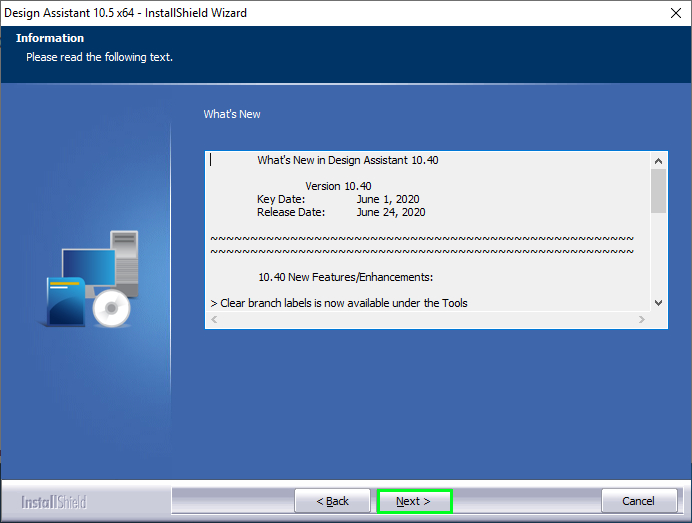
Step 10 - What's New
Read what's new in the program. This list highlights bug fixes and new features that have been added for your specific version.
Select Next.
Step 11 - Select Features
Select the features you'd like to install with the program.
Options:
 Default Help Files
 Sample Files
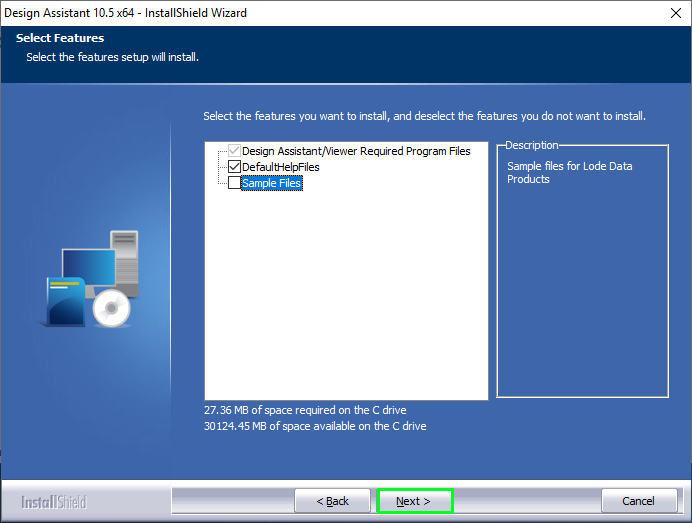
Default Help Files
Selected by default.
These are files that can be access from the program by selecting HELP from the pulldown menu. These are replaced by online documentation.
Sample Files
Unchecked by default.
This option will install our sample files. Consider installing these if you are new to the program and plan to go through the manual tutorials.
It is recommended for new users to load the SAMPLE files during the installation. This will provide samples of specification files* as well as network files which can help new users familiarize themselves with the program.
Change Default
The default location of the sample files is in the user's %APPDATA% directory. You may want to change the directory. The files should be installed in a directory where the user has proper read/write permissions.
Sample Specification Files
The SAMPLE specification files included with the installation are intended as samples only and should not be used for actual design projects.
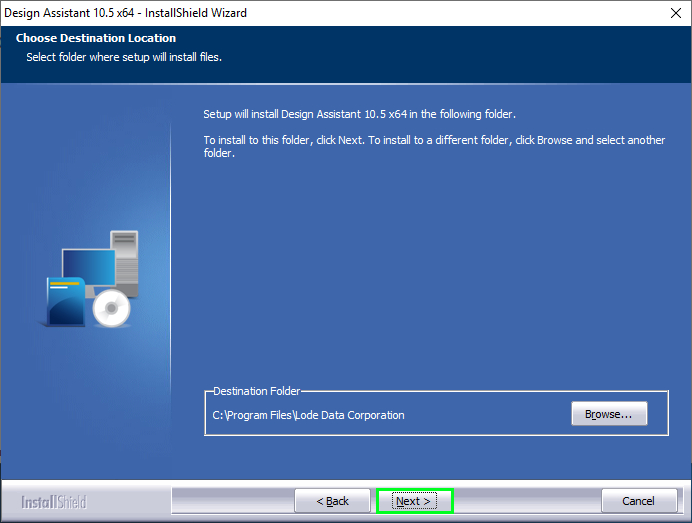
Step 12 - Destination Folder
C:\Program Files\Lode Data Corporation
Default location where the program is installed. You do not need to change this setting in 99.9% of cases.
Select Next
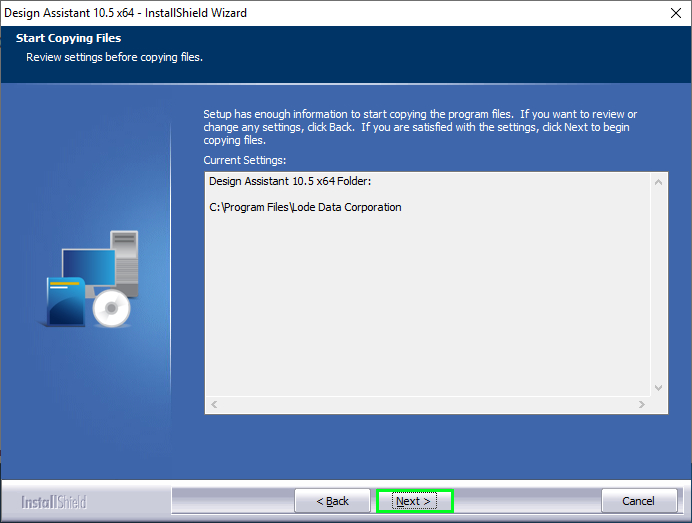
Step 13 - Review Current Settings
Review the current settings and selections you have made before proceeding with the installation.
Select Next.
Step 14 - Installation Wizard Complete
Select Finish to complete the installation.
Step 15 - Attach USB Hardware Lock/Key
Attach the USB device that Lode Data Corporation provided you. The device must be attached to a USB port directly on your computer. Using a hub or any other 3rd party device may cause the device to malfunction.
USB FAQ
For more information on your USB Key, please visit our USB Keys FAQ.
Step 16 - Launch Program
![]()
You should now have the Design Assistant icon on your desktop or start menu. Double click on the program to open and begin working with the program.