Tap Selection Group (TSG)
A Tap Selection Group or TSG is created to have different manufacture tap types. A typical use case is mixing legacy tap types with new generation taps in a network file.
In version 10.50 of The Design Assistant we've added a TSG column to the Design, Active Entry, Entry modes. This will allow the user to specify the TSG to be used for each tap on a given line/node of the program. Thus eliminating the need to lock down taps at each node.
The TSG dropdown will be used to determine what tap selection group will be used when no value is defined in the TSG column.
Creating a Tap Selection Group
To create a Tap Selection Group open the tap specs from the Spec Edit menu. You can create a group by leaving a blank line between the tap groups. In our step by step example below we will use our Lode.tap sample specs. For the sake of simplicity we will copy our existing values to a new group (2) below the originals.
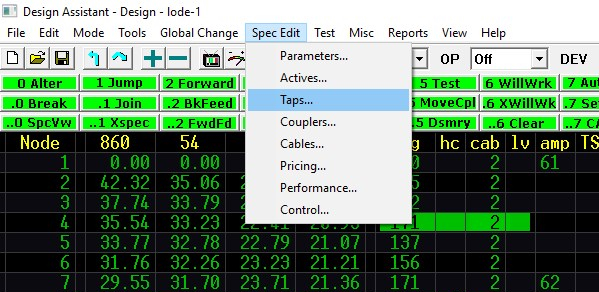
Select Spec Edit -> Taps
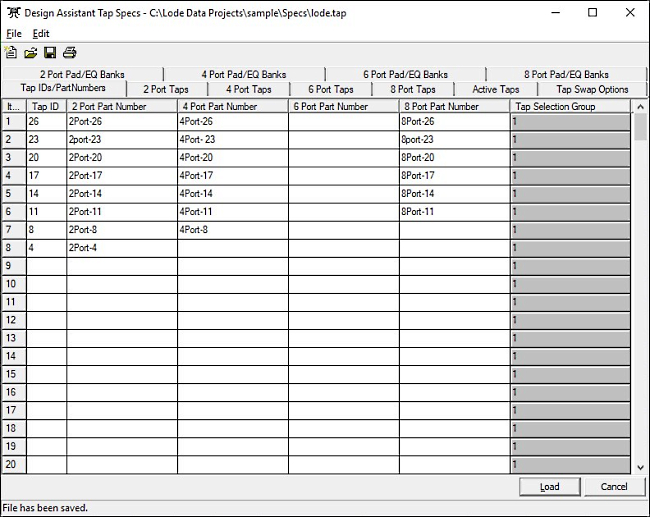
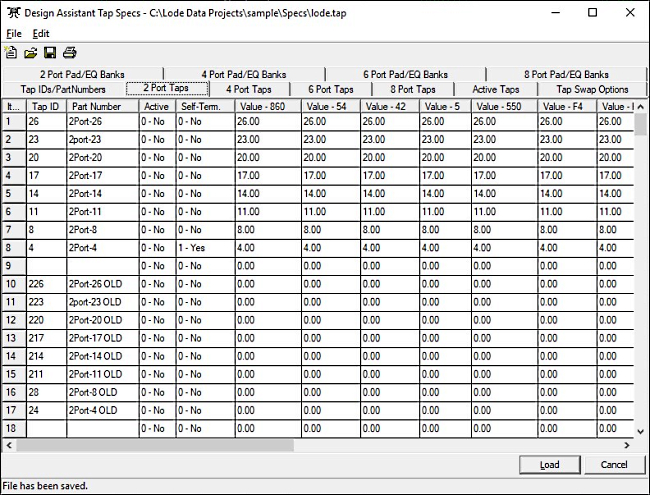
Our Lode.tap sample file only has 1 TSG as shown below.
Let's add a new group by leaving a blank line on row 9. We'll start with our next TSG on row 10.
Create a new TSG
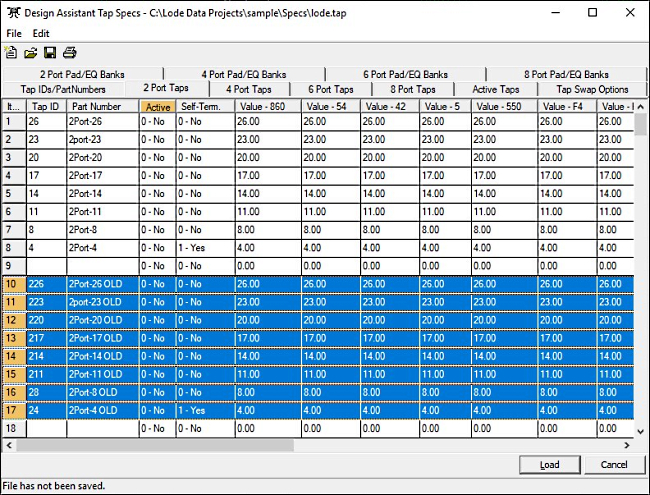
Create a new TSG by inputting Tap IDs and part numbers after a blank row.
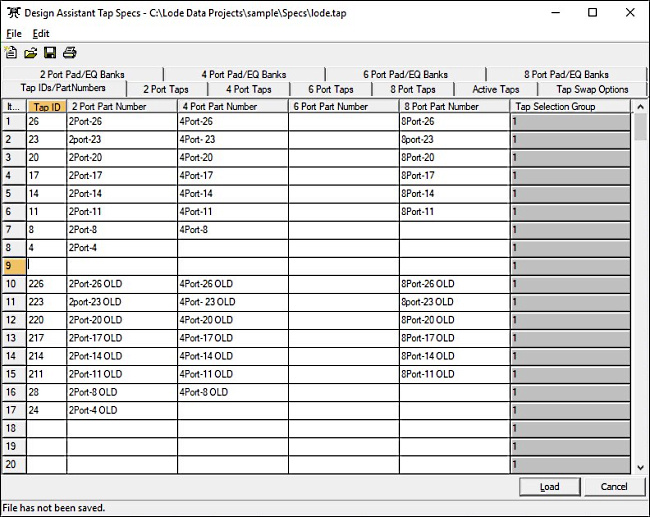
Notice that I've given that Tap ID a unique value to easily identify the TSG and tap value from the Design Mode. I've copied and pasted the value from TSG 1 for simplicity, but I've also added OLD to the part number.
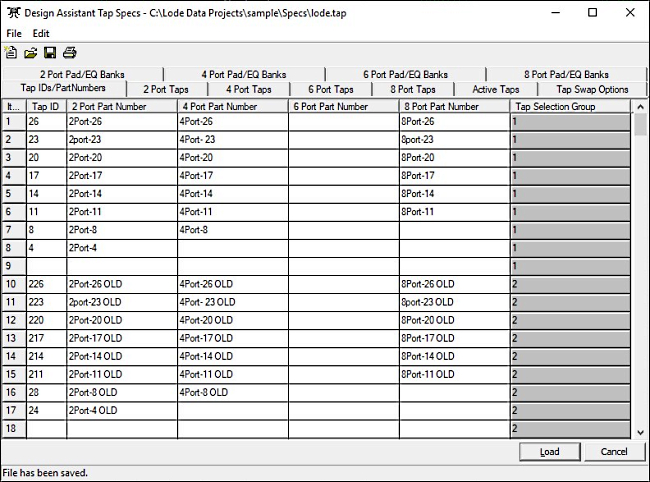
The Tap Selection Group column on the right will not update with the new TSG 2 until we have saved or hit Load.
Now that we have 2 tap selection groups we can add our loss values. We will use our 2 port taps as an example.
Create loss values
Move to the 2 Port Taps tab.
Here we will input our loss values, insertion losses, self-term, etc. Again, for simplicity we just copied our values from TSG 1.
Use TSG in Design
Now that we have 2 Tap Selection Groups we can specify which group to use in The Design Assistant.
Here is our original network:
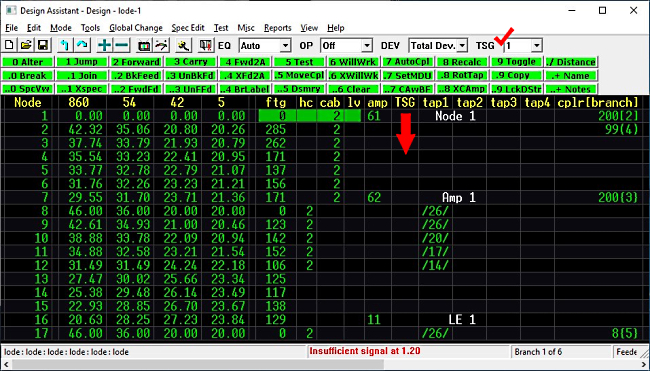
We've added a TSG column to the Design Mode indicated by the red arrow 🠗.
We can manually enter which TSG a tap should use by placing a value in the TSG column. If the TSG has a value of 0 (blank) then the program will use the TSG assigned from the TSG drop down (red checkmark ✓).
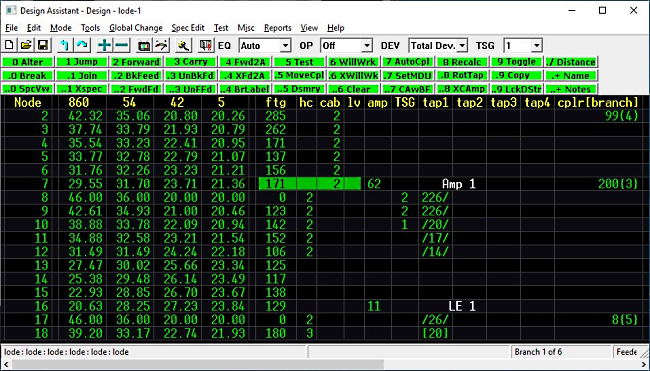
We've used TSG 2 on lines 8 & 9. When using 6 - WillWk the program will automatically use the TSG 2 values for calculations. Looking at the tap column we can see the tap value is 226/ so we can quickly see the tap value is TSG 2 with a value of 26.
On line 10 we've specified a TSG of 1. It won't make a difference in this scenario since our TSG dropdown menu is set to group 1. If we were to change the TSG dropdown menu to a different group line 10 would still use a TSG 1. It's a good idea to set the values to avoid accidently changing the TSG.
All other lines in this network are set to 0 (blank). This means the TSG dropdown is the determining setting for tap groups. Changing the TSG dropdown to group 3 for example will use TSG 3 at all lines with a 0 (blank) value in the TSG column.
Summary
Using the new features of Tap Selection Groups will allow our users to specify a TSG line by line in the Design Assistant, thus; eliminating the need to lock each node down.
It is good practice to either use TSG 1 as the default group so that you can leave the TSG blank(0) or to manually key in the TSG for each line.